Case Study on a Knoxville Commercial Roof Repair
Executive Summary
In the commercial real estate and property management sectors, a facility's roof is often treated as an invisible asset—until water breaks through the ceiling grid and threatens active business operations. In early 2026, a prominent multi-tenant industrial logistics and retail distribution hub located in Knoxville, Tennessee, faced an operational crisis.
Spanning approximately 52,000 square feet, the low-slope facility was plagued by systemic water intrusion that threatened millions of dollars in sensitive client inventory, specialized material-handling equipment, and tenant relations.
This technical case study provides an exhaustive breakdown of the forensic diagnostic process, structural challenges, economic analysis, and precision engineering execution required to remediate the facility. Instead of defaulting to a disruptive and incredibly costly total tear-off, a strategic, targeted structural repair and membrane restoration framework was implemented.
The project stands as a definitive blueprint for how regional property managers can navigate complex building lifecycles, balance capital expenditure (CapEx) accounts, and secure long-term structural resilience without halting facility operations.
1. Property Profile and Environmental Context
The Facility Asset
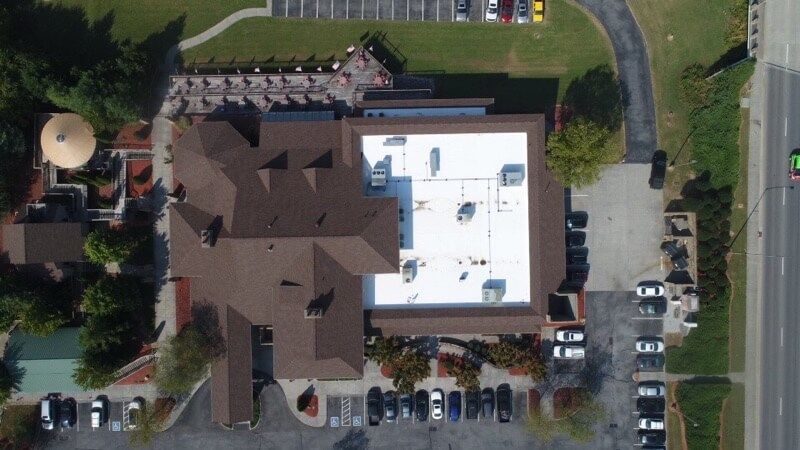
The subject property is a high-traffic, Class-B commercial logistics and fulfillment complex situated near a major shipping corridor in Knoxville, TN. Constructed in the late 1990s with subsequent expansions, the building features a hybrid structure: a structural steel bar-joist frame supporting a corrugated 22-gauge steel roof deck.
The existing roof assembly consisted of a vintage, mechanically attached 45-mil Black EPDM (Ethylene Propylene Diene Monomer) rubber membrane installed over a single layer of 1.5-inch polyisocyanurate (polyiso) insulation.
+----------------------------------------------------------------------------+
|                          PROPERTY SPECIFICATION MATRIX                      |
+----------------------------------------------------------------------------+
| Location:                  | Knoxville, Knox County, Tennessee             |
| Building Classification:   | Light Industrial / Logistics / Multi-Tenant   |
| Footprint Area:            | 52,000 Square Feet                            |
| Structural Substrate:      | 22-Gauge Corrugated Steel Decking             |
| Original System:           | Mechanically Attached 45-mil Black EPDM       |
| Primary Exposure Vector:   | High Thermal Cycles, Rapid Humidity Shifts    |
+----------------------------------------------------------------------------+
The Knoxville Climate Factor
The geographical location of East Tennessee introduces distinct environmental challenges that accelerate the degradation of low-slope commercial roofing systems. Knoxville experiences extreme seasonal temperature swings, prolonged periods of high relative humidity, and intense convective summer storms.
Over its 25-year lifespan, this specific EPDM roof expanded and contracted hundreds of times annually—a phenomenon known as thermal shock. Additionally, the dark surface of the black rubber membrane regularly recorded summer rooftop temperatures exceeding 160°F, baking the chemical plasticizers out of the rubber, leading to brittleness and advanced elasticity loss.
2. The Catalyst: Failure Symptoms and Operational Threats
The property management firm overseeing the facility reached out to local specialists for advanced commercial roofing in Knoxville, TN after a series of heavy spring rainstorms caused major operational disruptions.
Active Interior Threats
Water intrusion had progressed past the point of simple cosmetic annoyance. The building’s tenants reported the following critical failures:
- Inventory Compromise: A high-density e-commerce fulfillment tenant reported water dripping directly onto palleted electronics, leading to insurance claims and immediate logistical standstills.
- Life Safety Hazards: Water was tracking down internal structural steel columns, pooling near high-voltage electrical panels and forklift charging bays.
- Structural Degradation: Widespread sagging and rust stains were observed on the underside of the corrugated metal roof deck from inside the warehouse bays, pointing to prolonged water retention in the insulation layer.
The facility maintenance team had attempted numerous "quick-fix" localized patches using asphaltic mastics and emergency silicone sprays. However, these amateur repairs quickly failed due to material incompatibility and ongoing structural movement, proving that a comprehensive, professional diagnostic intervention was required.
3. The Forensic Diagnostic Process
To design a long-term repair protocol that would satisfy underwriting guidelines and protect the asset, a rigorous forensic analysis was conducted. Rather than executing visual guesswork, a multi-stage, non-destructive testing methodology was deployed.
Stage 1: Thermal Mapping via Drone Infrared Thermography
Because water holds heat far longer than dry roofing components, infrared thermography is the gold standard for locating hidden moisture. A drone equipped with a calibrated radiometric thermal imaging camera was flown over the facility three hours after sunset, following a clear, warm day.
The resulting thermographic imagery mapped out distinct, glowing "hot spots" across the roof. These thermal anomalies pinpointed exactly where water had bypassed the EPDM membrane and completely saturated the underlying polyiso insulation boards.
The thermal scan revealed that despite severe interior dripping, the subsurface moisture saturation was localized to approximately 18% of the total roof footprint, concentrated primarily around HVAC curbs, low spots, and perimeter parapet walls.
Stage 2: Mechanical Core Sampling
To ground-truth the infrared data, technicians extracted physical core samples from both the thermal anomaly zones and the control (dry) zones.
   [EPDM Membrane Surface]  --->  (Micro-fissures / Failed Seams)
             |
   [Polyiso Insulation Layer] --->  (Sponge Action: Water Retention Area)
             |
   [Steel Deck Substrate]   --->  (Oxidation & Structural Fastener Degradation)
The core samples cut from the hot-spot zones confirmed the worst-case scenario: the insulation boards had lost all structural density and were holding water like a sponge.
More importantly, the cores revealed that the underlying 22-gauge steel deck was exhibiting surface oxidation (rust) but retained its structural gauge thickness and structural integrity. No deep scaling or metal perforation had occurred yet, meaning the deck could be saved if immediate action was taken.
Stage 3: Perimeter and Component Audit
A physical inspection of the roof components revealed systemic detailing failures. Property managers often overlook these edge assemblies, but a review of why commercial roofs need regular inspections demonstrates that peripheral components are almost always the primary point of failure. The audit uncovered:
- Seam Delamination: Over 3,500 linear feet of factory and field seams had suffered adhesive breakdown. The vulcanized tape was peeling away, allowing water to enter via capillary action.
- HVAC Curb Flashings: Heavy rooftop mechanical units had vibrated over two decades, causing the un-reinforced EPDM flashings to tear away from the metal unit curbs.
- Terminated Edge Failure: The perimeter coping metal lacked continuous cleat engagement, allowing high wind gusts to lift the membrane edge and drive wind-blown rain straight into the building envelope.
4. The Engineering Dilemma: Repair, Restoration, or Total Replacement?
With diagnostic data in hand, the engineering team compiled a financial and technical matrix to present to the building owners. The project required balancing immediate cash flow preservation with long-term structural asset protection.
Option 1: Total Tear-Off and Replacement
This path would require stripping the entire 52,000 sq. ft. roof down to the bare steel deck, replacing all insulation, and installing a new membrane.
- Financial Projection: Estimated at $14.00 to $18.00 per square foot, totaling over $750,000.
- Operational Disruption: High. Open roof areas would expose active logistics bays to weather risks, requiring temporary tenant shutdowns.
Option 2: Localized Patches Only
Continuing to dispatch maintenance crews to apply topical patches.
- Financial Projection: Low immediate cost ($5,000–$10,000 annually), but a high long-term deficit.
- Operational Disruption: Continuous, unpredictable leaks and ongoing inventory damage claims.
Option 3: Engineered Repair and Membrane Restoration
This hybrid approach involved cutting out and replacing only the 18% of saturated insulation mapped by the infrared scan, mechanically securing the remaining dry assembly, re-engineering all flashing penetrations, and sealing the entire structure with a high-solids silicone coating system.
- Financial Projection: Estimated at $6.50 to $8.00 per square foot, totaling approximately $364,000—a capital savings of nearly 50% compared to a full replacement.
- Operational Disruption: Minimal. The building would remain completely watertight throughout the phased repair process.
To evaluate how these capital costs could be structured over a multi-year period without draining operational cash reserves, the management firm reviewed modern commercial roofing financing options to secure an optimal capital-improvement loan tier before breaking ground. The owners ultimately selected Option 3.
5. Step-by-Step Project Execution
The project required a meticulous, highly scheduled workflow executed by a certified commercial roofing crew to ensure the building remained secure from sudden weather shifts.
+----------------------------------------------------------------------------+
|                       PROJECT WORKFLOW TIMELINE & PHASES                   |
+----------------------------------------------------------------------------+
| Phase 1: Defective Material Extraction (Days 1–5)                          |
|   - Exposing and cutting out thermal hot-spots down to the steel deck.      |
|                                                                            |
| Phase 2: Structural Stabilization & Substrate Preparation (Days 6–10)      |
|   - Wire-brushing surface rust; installing polyiso and coverboards.         |
|                                                                            |
| Phase 3: Detail Re-Engineering & Seam Sealing (Days 11–16)                 |
|   - Applying flashing reinforcer; pressure-washing; updating curbs.        |
|                                                                            |
| Phase 4: Monolithic Fluid-Applied Silicone Application (Days 17–22)        |
|   - Applying high-solids silicone coating at 30 mils dry film thickness.  |
+----------------------------------------------------------------------------+
Phase 1: Defective Material Extraction
Using the infrared drone maps as a digital guide, crews marked out the exact boundaries of the wet insulation zones on the roof surface. Specialized membrane cutters were used to cleanly open the EPDM skin.
The waterlogged polyiso boards were removed and lowered into disposal bins. The exposed steel deck was thoroughly swept and inspected for structural gauge loss.
Phase 2: Substrate Stabilization and Infill
Every area of exposed steel decking that exhibited minor surface oxidation was treated with a zinc-rich, rust-inhibiting primer coat to stop future corrosion.
Once the primer cured, technicians installed new, dry layers of 1.5-inch polyisocyanurate insulation, topped with a high-density, moisture-resistant gypsum coverboard.
The new insulation infill was mechanically attached to the structural steel deck using heavy-duty, corrosion-resistant fasteners and 3-inch stress plates, matching the height of the surrounding existing roof profile.
Phase 3: Detail Re-Engineering and Seam Remediation
Before applying any waterproofing topcoats, the existing EPDM membrane surface required rigorous mechanical modification. The entire roof was swept clean of loose debris and washed using a specialized, eco-friendly primer-cleanser at 3,000 PSI to strip away 25 years of accumulated atmospheric soot, grease, and biological growth.
Once dry, crews tackled the failed seams and penetrations by utilizing an expert efficient roof repair protocol designed for high-stress industrial environments:
- Seam Reinforcement: Every linear foot of factory and field seam was overlaid with a 6-inch-wide self-adhering fleece-backed flashing tape, creating a redundant structural bridge over old adhesive joints.
- HVAC Curb Flashing: Old EPDM curb wraps were completely cut away. Technicians applied a liquid-applied, fabric-reinforced polymethyl methacrylate (PMMA) flashing system around the base of all 14 rooftop HVAC units. This material forms a seamless, form-fitting chemical bond directly to both the metal unit housing and the rubber roof deck, eliminating the risk of vibration-induced tearing.
- Drain and Scupper Overhaul: The existing cast-iron roof drains were stripped down, fitted with new clamping rings, and sealed with heavy-duty butyl sealants to eliminate backflow leaks.
[New Silicone Top Coat] 15 Mils
  [Silicone Base Coat]   15 Mils
    [Fleece Reinforcing Mesh Tape] (Over Seams/Cracks)
      [Cleaned, Primed EPDM Membrane Element]
Phase 4: Application of the Monolithic Fluid-Applied System
The final stage of the repair involved transforming the old, segmented, high-maintenance EPDM roof into a continuous, seamless, bright-white elastomeric structure.
Crews utilized a professional-grade, high-solids, 100% silicone fluid-applied coating system. Unlike standard paints, high-solids silicone does not degrade under constant UV exposure and can withstand permanent ponding water conditions without breaking down.
The silicone was applied using a high-pressure commercial airless sprayer in a phased two-coat process:
- Base Coat: Applied at a rate of 1.5 gallons per 100 square feet, pigmented light gray to ensure uniform coverage tracking.
- Top Coat: Applied perpendicular to the base coat at a rate of 1.5 gallons per 100 square feet, pigmented ultra-white.
The final cured system achieved a total Dry Film Thickness (DFT) of 30 mils. This bright white surface immediately altered the building’s thermal performance, turning a highly absorbent black heat sink into a highly reflective "cool roof" that reflects over 85% of solar radiation.
6. Overcoming Local Operational and Environmental Challenges
Executing a commercial repair project of this scale in East Tennessee requires adapting to active tenant workflows and shifting weather patterns.
Managing Tenant Workflow Disruption
The facility housed a 24/7 fulfillment operation with constant freight truck traffic in the loading bays below. Staging heavy cranes to lift materials could have blocked transit lanes, causing expensive shipping delays.
To prevent this, the roofing team coordinated all heavy material staging and loading protocols between 10:00 PM and 4:00 AM. Crane lifts were executed over unoccupied warehouse zones, ensuring that business operations faced zero downtime during peak fulfillment hours.
Adapting to East Tennessee Weather Window Dynamics
Because silicone coatings require dry surfaces for proper cross-linking and adhesion, the unpredictable afternoon thunderstorms common to the Knoxville region presented a constant risk.
The project manager utilized advanced localized micro-radar weather tracking. Work was structured in bite-sized, daily phases: only areas of the roof that could be completely repaired, filled, and sealed within a rolling 4-hour window were opened at any given time. This disciplined approach kept the interior warehouse completely dry during construction.
7. Results, Financial Performance, and Long-Term Projections
The Knoxville commercial repair project was completed in 22 calendar days, hitting all architectural specifications and budget projections.
Thermal and Energy Efficiency Metrics
Six months post-completion, the property management firm analyzed the utility data for the facility. By replacing the wet insulation and transitioning the building from a dark EPDM surface to a highly reflective white silicone coating, the building's peak summer cooling costs dropped by an impressive 22%.
The HVAC units, which previously cycled constantly during hot afternoon hours, saw their operational loads drastically reduced, extending the useful service life of expensive rooftop mechanical assets.
+----------------------------------------------------------------------------+
|                        PROJECT PERFORMANCE COMPARISON                      |
+----------------------------------------------------------------------------+
| Metric Evaluation          | Pre-Repair Status      | Post-Repair Status   |
+----------------------------------------------------------------------------+
| Rooftop Summer Temp:       | 162°F (Absorptive)     | 94°F (Reflective)    |
| Interior Leak Frequency:   | Chronic (Every Rain)   | Zero Active Leaks    |
| Average Monthly HVAC Load: | 100% Peak Operation    | 78% Standard Load    |
| Structural Life Extension: | Expired / Failing      | +20 Years Extended   |
+----------------------------------------------------------------------------+
Capital Allocation & Warranty Protection
From a financial perspective, the strategy was an undeniable success. The owners avoided an expensive full tear-off and diverted over $380,000 in projected capital costs toward other high-yield property improvements.
Because the repair and restoration were executed by a manufacturer-certified commercial contractor, the building owners secured a 20-year, full-system NDL (No Dollar Limit) material and labor warranty. This warranty guarantees that any future leak repair costs are fully covered by the manufacturer, removing roofing liability from the property management firm’s operational budget until 2046.
8. Strategic Takeaways for Commercial Property Owners
The successful restoration of this Knoxville logistics hub highlights several critical lessons for real estate investors, facility managers, and business owners managing commercial assets across East Tennessee.
Avoid the "Out of Sight, Out of Mind" Pitfall
Many commercial roof systems are left uninspected until interior ceiling tiles collapse or inventory is destroyed. By that point, small punctures have usually grown into widespread insulation saturation, destroying any chance of executing a low-cost restoration.
Implementing a structured approach by selecting the best roofing options for flat roofs and matching them with rigorous annual inspections ensures that minor detail flaws are caught and repaired before they compromise the underlying structure.
Leverage Non-Destructive Technology
If a commercial roofer steps onto a facility and instantly recommends a total roof replacement based solely on a quick visual walkthrough, property owners should ask for deeper diagnostics.
As demonstrated in this case study, drone infrared thermography and physical core testing provide objective, empirical proof of your roof's internal health. Identifying that the moisture is confined to specific quadrants allows you to isolate repairs, save your dry insulation, and protect your bottom line.
Invest in Proactive Maintenance Frameworks
The structural longevity of a commercial roof depends on continuous oversight. Establishing a relationship with a certified partner to implement the best roof maintenance service in east tn turns unpredictable emergency expenditures into predictable operational investments. Regular drainage clearance, seam inspections, and immediate detail touch-ups prevent water from ever migrating into the building core, allowing you to maximize the economic lifespans of your commercial assets.
Conclusion
The commercial repair executed on this Knoxville logistics hub proves that structural failure does not always require a total structural tear-off. Through forensic diagnostics, precise sub-membrane insulation replacement, and advanced fluid-applied silicone engineering, the property management firm successfully protected its tenants, slashed utility expenses, saved hundreds of thousands of dollars in capital reserves, and reset the clock on an invaluable structural asset for the next two decades.